Actions for Harvest Batches
How to get to the most important views
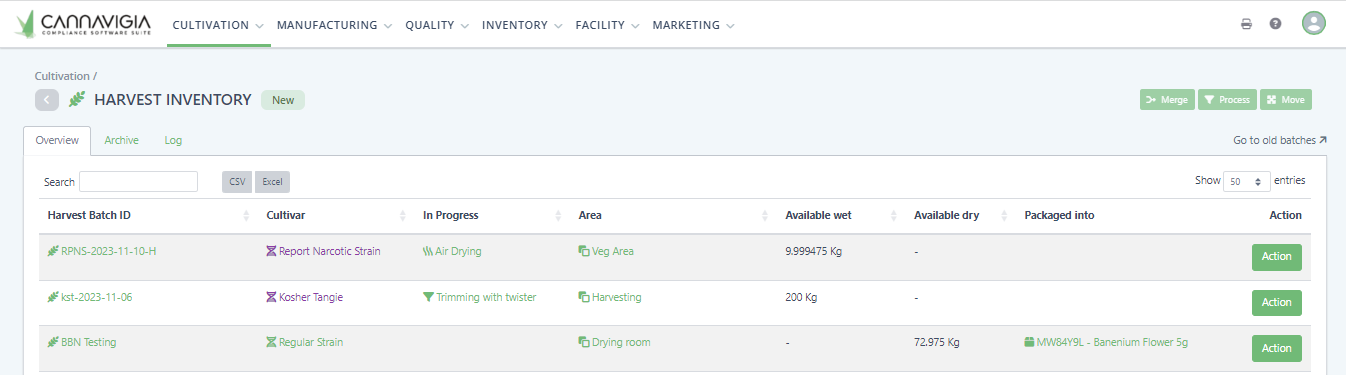
Harvest Inventory
To get to the harvest inventory click on Cultivation > Harvest
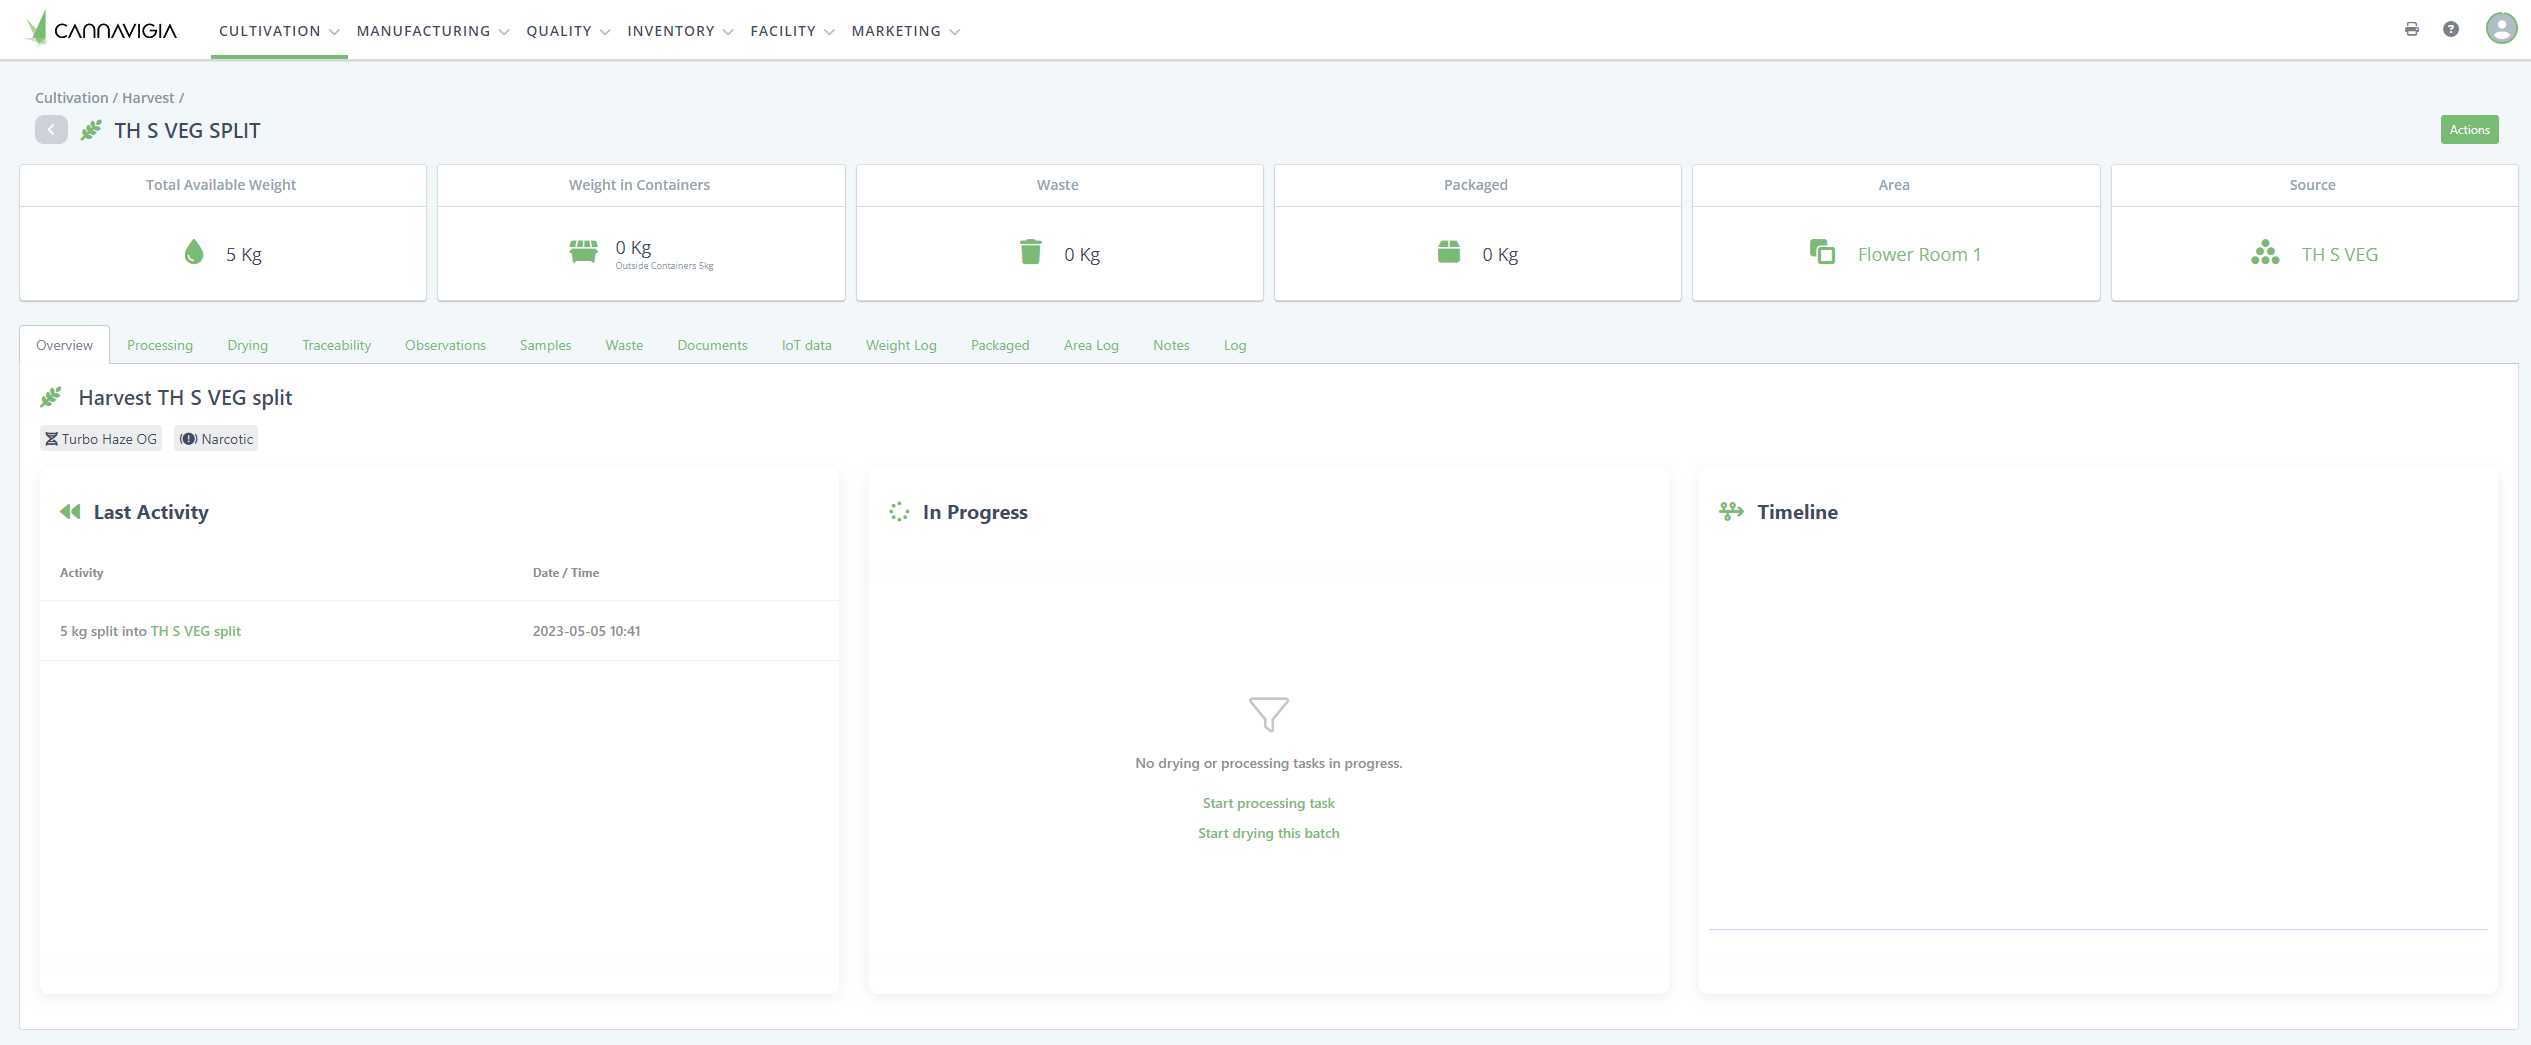
Harvest Batch Detail-View
To get to the harvest batch detail-view click on Cultivation > Harvest and then click on the Batch ID of the harvest batch you want to look at more closely
Changing the Batch ID
To change the batch ID follow these steps:
In the detail view or the harvest inventory, click on Action
Then click on Edit Harvest Details
Input the new Harvest Batch ID
Click Save
If you selected Harvest all plants to keep the Batch ID and QR code for primary processing then you cannot change the Batch ID.
Changing the amount of Plants harvested
In the detail view or the harvest inventory, click on Action
Then click on Weigh in wet weight
Input the new amount of plants or add plant tags
Click Save
Starting and finishing a processing task
Processing tasks are the different processes used to treat the plant material. This includes processes such as debudding and trimming.
Tasks have to be previously added, see: Task. Make sure they are of the category harvest processing
Move a harvest batch (changing the area)
In the detail view or the harvest inventory, click on Action
Then click on Move
Select the target area you would like to move it to
Click Move
Move multiple harvest batches at the same time
In the harvest inventory (Cultivation > Harvest)
Select the batches you want to move by clicking in the column
In the top right click on move
Deselect batches you might have selected by accident
Select target area
Click Move
Weigh in wet weight
Weigh in wet weight is only possible before a drying is finished. Once a drying has been finished you can no longer add wet weight.
In the detail view or the harvest inventory, click on Action
Then click on weigh in wet weight
Input all the fields to add a weight entry
Weight and unit
Equipment used for weighing
Container, if you want to load the weight into the container right away
Click add to table to add the weight entry to the batch
Remove mistakes by clicking on the x button in the table
Click on save
Weigh in dry weight
This action will only be available after a drying was finished.
In the detail view or the harvest inventory, click on Action
Then click on weigh in dry weight
Input all the fields to add a weight entry
Weight and unit
Equipment used for weighing
Container, if you want to load the weight into the container right away
Click add to table to add the weight entry to the batch
Remove mistakes by clicking on the x button in the table
Click on save
Start Drying
Drying a harvest batch will start to dry the complete weight of the batch. If you want to dry the batch differently, you can split the batch to create another harvest batch that can be dried differently.
In the detail view or the harvest inventory, click on Action
Then click on Start Drying
Select the Task that has to be followed for the drying
Select the Area. This will move the batch to the selected area once save is clicked
Input the Date the drying is started. The start date cannot be set in the future.
Select all Equipment that are used in the drying process. You can select multiple equipment.
Make sure the initial weight is correct
Click on Start
Editing a Drying in Progress
If you want to change the task, equipment or the start date of a drying that is already in progress without finishing it then follow the steps below.
The area cannot be changed, to change the area perform the move action.
Open the detail-view of the harvest batch that is drying (Cultivation > Harvest > Click on Batch ID)
In the overview you can see the drying that is in progress, click on the name
Change the properties you want
Click on Save
Finishing a Drying in Progress
Finishing drying a harvest batch will set the wet weight to 0 and allow you to start weighing in the dry weight.
In the detail view or the harvest inventory, click on Action
Then click on Finish drying (a drying has to be in progress for this action to be available)
Input the finished date, additionally you can also change the started date.
Click on Finish
Package harvest batch
Packaging a harvest batch will create a batch of an article. You can package the harvest batch into article with any unit type. The actual batch size of the article and the used weight from the harvest batch are input separately.
In the detail view or the harvest inventory, click on Action
Then click on Package (only available if there is available weight)
Input all the required fields
All the required information on the article batch
Article
Batch code
Batch size
Storage area
Expiration date
The used weight entries from the harvest batch. You can add as many weight entries as required, click add to table for each new weight entry.
Weighed weight and unit
Used equipment for weighing
The used packaging material. Make sure to click Add to add the selected packaging material batch.
Article
Article batch
Used amount
Click Create
Splitting a harvest batch
Splitting a harvest batch will create a new harvest batch using the plant material from the batch you are performing the action on. This allows to process or dry the split plant material differently.
In the detail view or the harvest inventory, click on Action
Then click on Split Batch
On the left you see the current (source) batch and on the right you see the batch that will be created through this action
Input Properties of the new batch
Batch ID
Area of the new harvest batch
Add weight from the source batch by adding weighing entries.
Input
Weight and unit
Equipment used for weighing
Container, if you want to load the weight into a container straight away
Click Add to table
Repeat steps i - iv until you have split all the plant material you want in the new batch.
Click Save
Add additional weight to the split batch
If you want to add additional weight to an already split batch follow these steps:
In the detail view or the harvest inventory of the split batch, click on Action
Click on Edit Harvest Details
Add weight from the source batch by adding weighing entries. You can see how much is available in the source batch in the respective field on the right.
Input
Weight and unit
Equipment used for weighing
Container, if you want to load the weight into a container straight away
Click Add to table
Repeat steps i - iv until you have split all the plant material you want in the new batch.
Click Save
Merging harvest batches
Merging batches will merge all available weight of two batches of identical quality into one single batch. Make sure the batches you are merging are identical according to your specifications.
Only batches with the same cultivar and the same phase (wet or dry processing) can be merged. Additionally when there are processing tasks or drying in progress they cannot be merged.
In the harvest inventory select the batches you want to merge by clicking in the column.
Then in the top right click on Merge
Add additional batches you would like to merge by:
Selecting the harvest batch
Clicking on Add to table
Input the required information for the new (merged) batch
Batch ID
Select Area
Reason for merging
Click on Merge
OR
In the detail view or the harvest inventory, click on Action
Click on Merge Batches
Add batches you would like to merge by:
Selecting the harvest batch
Clicking on Add to table
Input the required information for the new (merged) batch
Batch ID
Select Area
Reason for merging
Click on Merge
Loading and unloading harvest container(s)
Harvest containers have to be created before they can be selected, see Containers
Loading weight into a harvest container
To load weight into a container follow these steps:
In the detail view or the harvest inventory of the batch you want to load into container(s), click on Action
Click on Load Containers
Now you can start weighing into the harvest container by inputting
Weight and unit
Equipment used for weighing
The container you want to load
Click Load to load the selected weight into the container
Repeat a to d until you have loaded all the weight you want
Click save
At the top left you can see how much weight was not yet loaded. If you want to change plant material from one container to another you have to first unload and then load again.
Unloading harvest containers
In the detail view or the harvest inventory of the batch you want to load into container(s), click on Action
Click on Unload Containers
Now you can see all containers loaded with this harvest batch
Click on unload to unload the weight in a container
If you want to unload all containers click on Unload all
Click save
Upload a document to a harvest batch
If you have documents you would like to attach to a harvest batch follow these steps:
In the detail view or the harvest inventory of the batch you want to upload a document to, click Actions
Click on Upload Document
Choose the document from a location of your device
You can add a description of the document
Click Save
Log loss of a harvest batch
If you want to log the loss of weight of a harvest batch due to drying (not connected to a drying process), Theft or during processing (not waste) then follow these steps:
In the detail view or the harvest inventory of the batch you want to log loss, click on Action
Click on Log Loss Containers
Input the required data
Select a reason for the loss of weight
Input the weight and unit of the lost weight
Click save
Take sample of a harvest batch
To take a sample from a harvest batch follow these steps:
In the detail view or the harvest inventory of the batch you want to take a sample from, click on Action
Click on Take Sample Containers
Describe the content of the sample such as “Dried Flowers before trimming”
Input the weight and unit of the sample
Select the date
Click save
To learn more about samples, check out Samples
Print label of a harvest batch
To print a label with the QR code on it follow these steps:
In the detail view or the harvest inventory of the batch you want to print a label for, click on Action
Click on Print Label
Select the format (size)
Click Print selection
The software will open a new window where you labels are being generated, when the status is set to done, click on the print icon on the right
Now you can print the label from your browser
Add note to a harvest batch
To add a note about a harvest batch follow these steps:
In the detail view or the harvest inventory of the batch you want to write a note for, click on Action
Click on Add a Note
Write your Note
Click Save
Record an observation on a harvest batch
To record an observation about a harvest batch follow these steps:
In the detail view or the harvest inventory of the batch you want to log an observation for, click on Action
Click on Record Observation
Write the observation
Upload an image (not mandatory)
Select the date of the observation
Click Save