Recording Goods Out
Creating a New Shipment
On the Goods Out page (Inventory > Goods Out) you can record all outgoing goods.
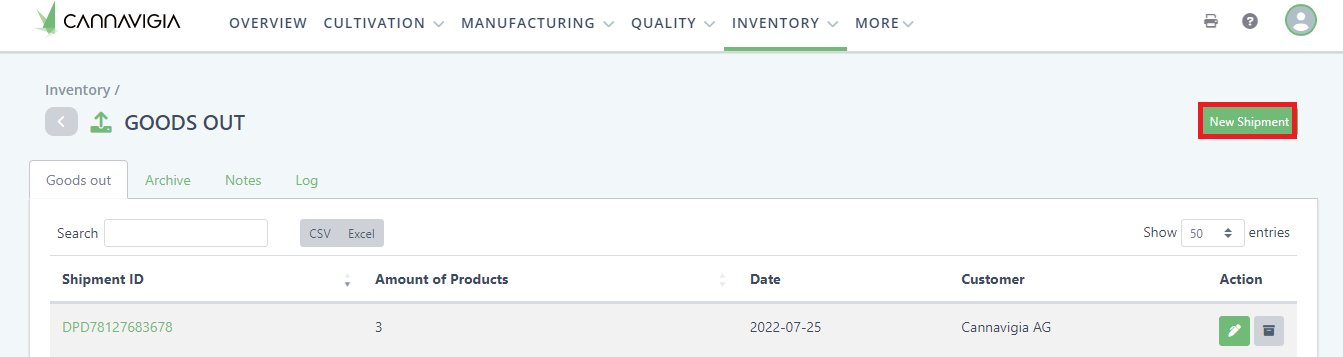
To record a Goods Out, click on the green New Shipment button.
The Shipment window will open.
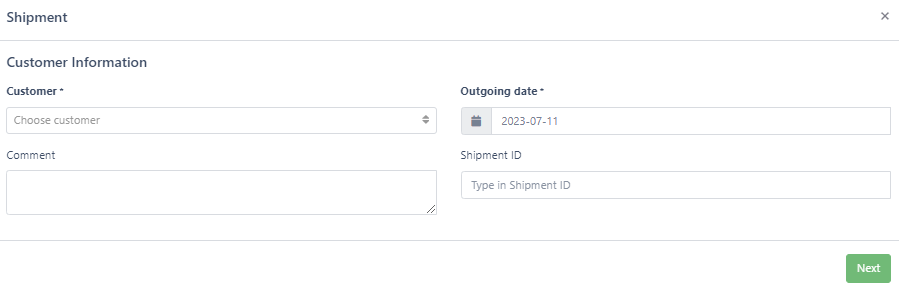
Select the Customer from the drop-down list. Note: Customers must first be entered under Setup > Contacts.
Enter the Outgoing date. This is the actual date it left/will leave the facility (you can also schedule the delivery in the future).
Type in Shipment ID.
Enter any Comments or remarks you have about the outgoing goods.
Click Next.
Select the Article that is outgoing from the drop-down list. Note: Articles must first be entered under Setup > Articles and there needs to be at least 1 batch of that article created.
Click Add to Shipment button.
Type Shipped Quantity.
If you want to adjust the price of a specific batch, fill in the desired price in the batch price column
Note: The batch price will not influence the article price. If you want to change the article price head over to Intentory > Articles > Edit article.
Once the article has been added to Shipment, all the available Article batches with their Expiry date and amount In Stock will appear and the amount typed will be subtracted from the oldest batch. Check if quantities are in accordance with the batches and if not, enter the quantity you wish to record as outgoing next to the individual batches. The system will automatically calculate the total Quantity.
Repeat the process above for each article to be added to Shipment.
Click Next.

When you have finished adding all your articles and selecting Documents, click on the green Save button.
By clicking Save, the system will create the new shipment and lead you to the Shipment Detail view.
Finishing Shipment
On the Shipment Detail view, click on the Finish button in the upper right corner to complete Shipment.
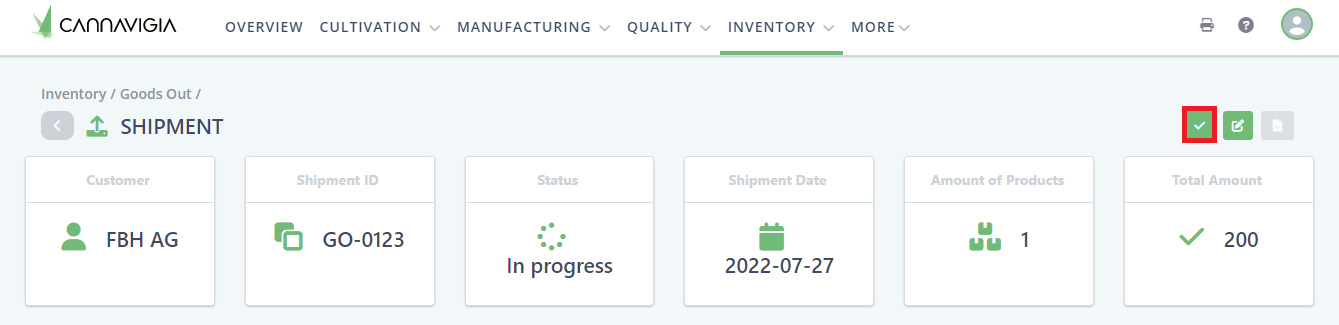
Note: By finishing shipment you will no longer be able to edit this delivery and you can print the delivery note.
Learn more about: Delivery notes