Planning and Creating Goods In Deliveries
Create an Inbound Delivery
This action allows you to create a new Inbound Delivery, to record incoming Article Batches so you can plan your Goods In in advance and receipt them in upon arrival by following these steps.
Login to the Cannavigia system.
Navigate to Goods In by clicking on Inventory → Goods In.
Click on the green Create Inbound Delivery button in the top right-hand corner.

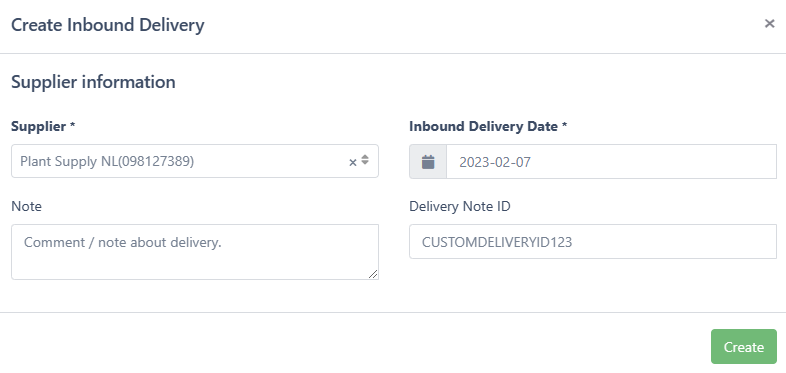
Create Inbound Delivery modal will open.
From the ▼ drop-down menu, select the Supplier and then select the Inbound Delivery Date and type in the Delivery Note ID if you want to customise it.
Optionally, you can add a Note about the delivery.
Click Create to create your Inbound Delivery.
Note: Suppliers must be individually added beforehand if they do not already exist in the system via Inventory → Contacts so that an Inbound Delivery can be created.
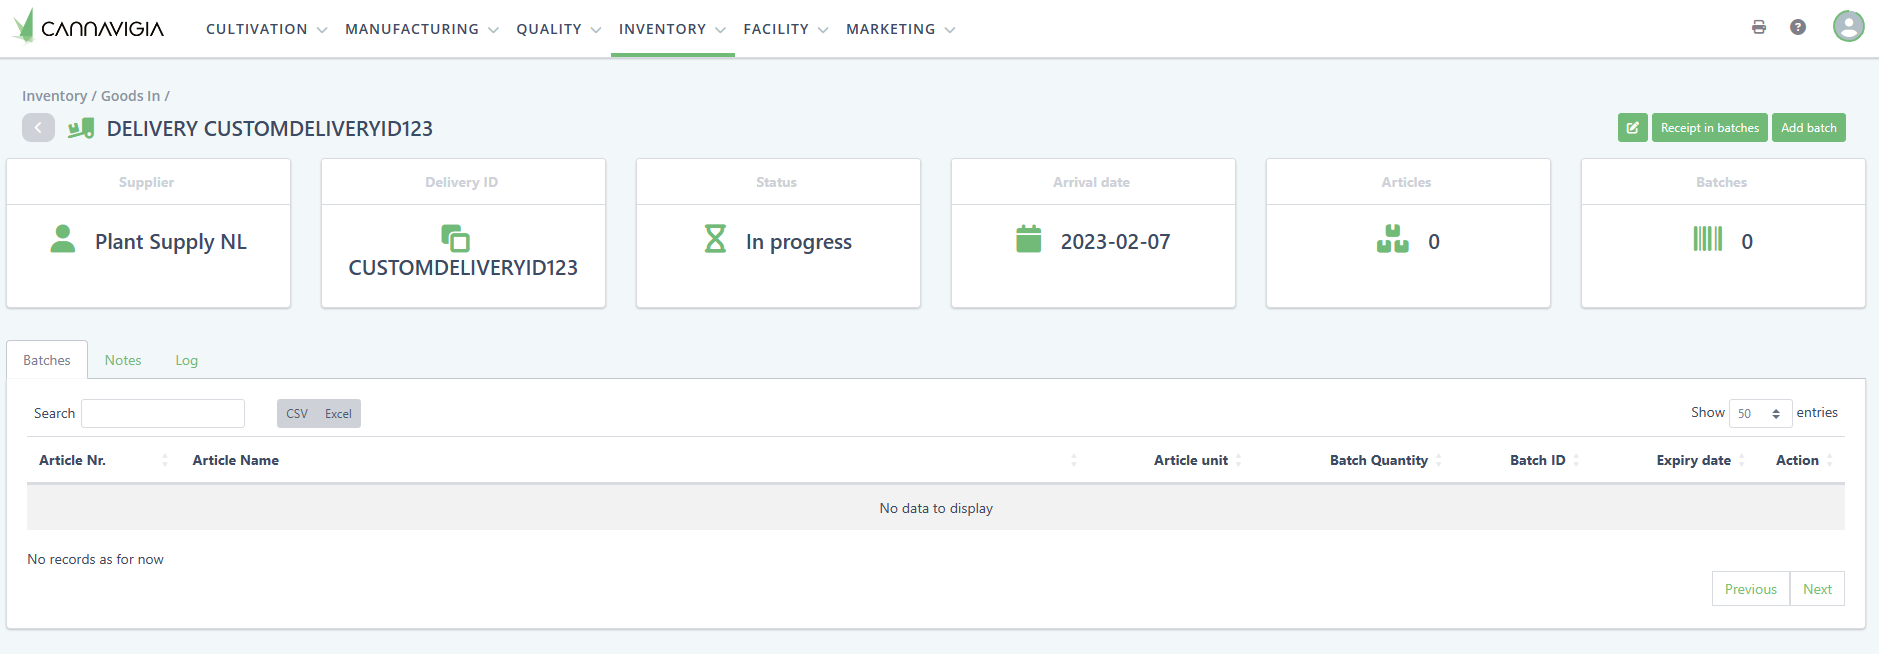
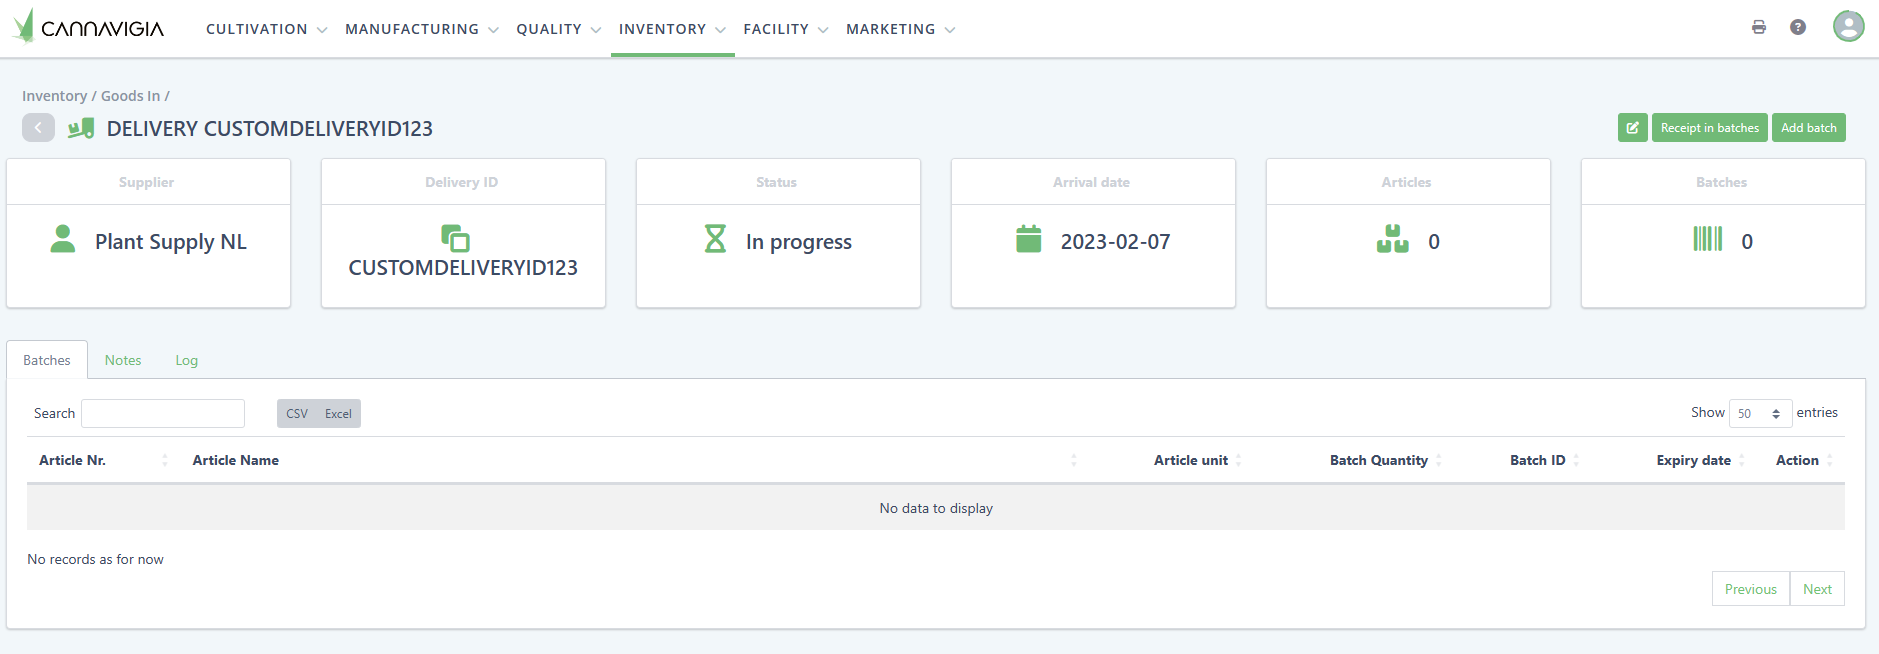
Once you have clicked Create, you are automatically navigated to the Inbound Delivery Detail View where you can see your newly created Delivery Note ID.
Add Articles to an Inbound Delivery
Note: Articles must be individually added / created beforehand in Inventory → Articles before they can be added to the Inbound Delivery.
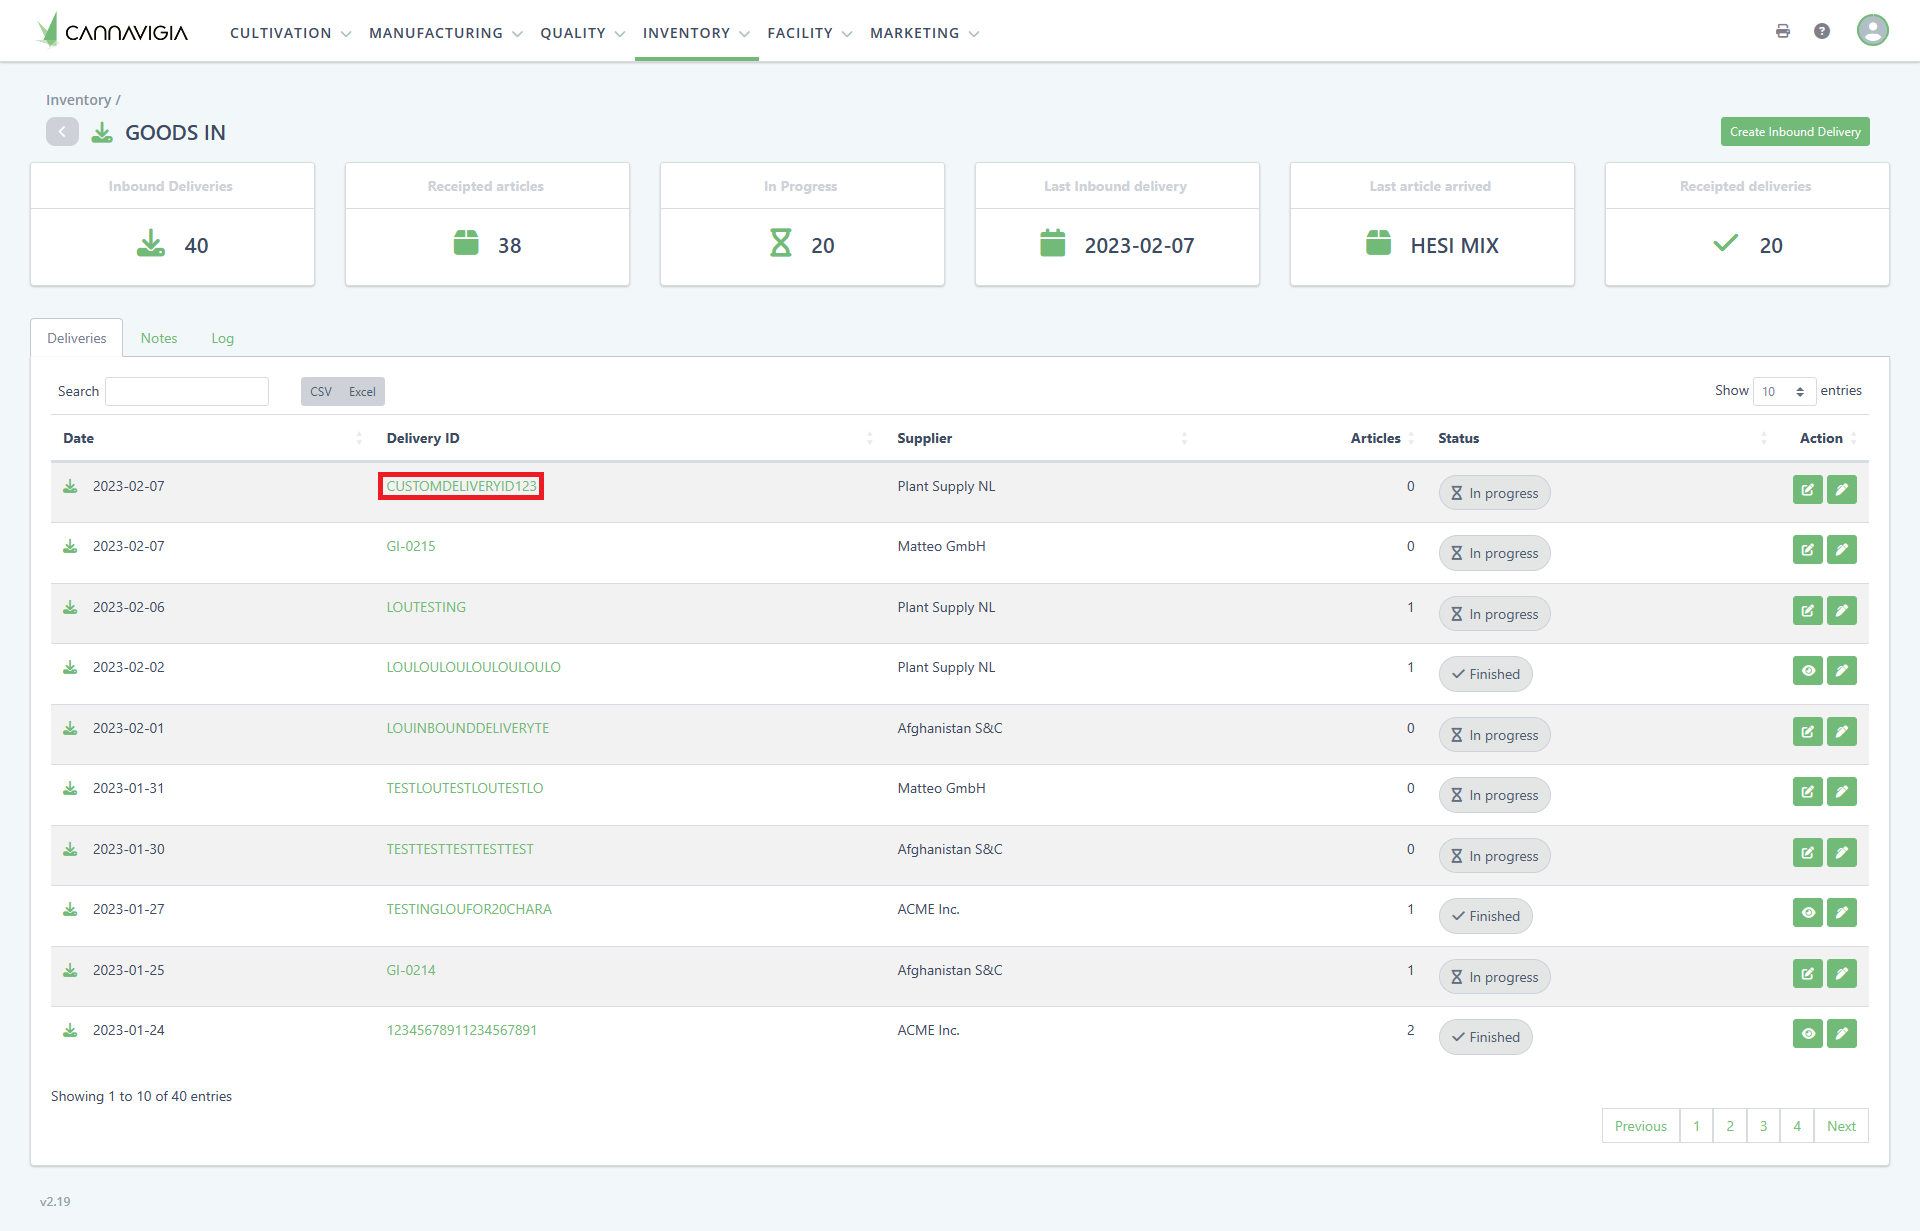
Navigate to Goods In via Inventory → Goods In and select your required Delivery Note ID by clicking on the green hyperlink of the Delivery Note ID to access the Inbound Delivery Detail View, if you are adding the Articles at a later date / time.

Note: Articles must be individually added / created beforehand in Inventory → Articles before they can be added to the Inbound Delivery.
Within the Inbound Delivery Detail View, click on the green button Add batch in the top right-hand corner.
The Add Batch to Delivery_ID modal opens.
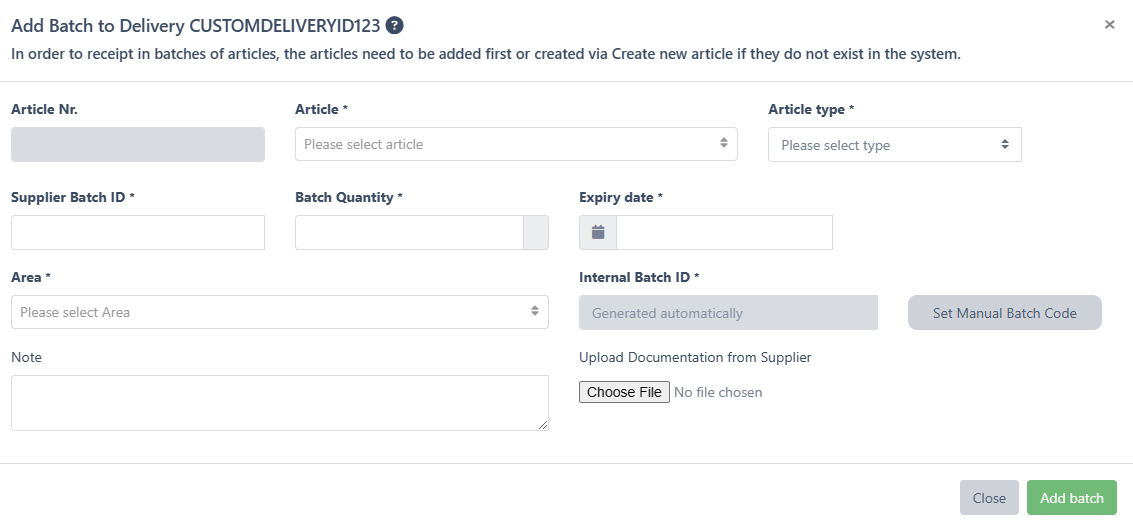
Please input the following information within the Add Batch to Delivery_ID modal
Select Article Type dropdown field first if you do not know the name of your Article and you need to reduce the search be selecting the Article Type first
If the Article Type = Plant
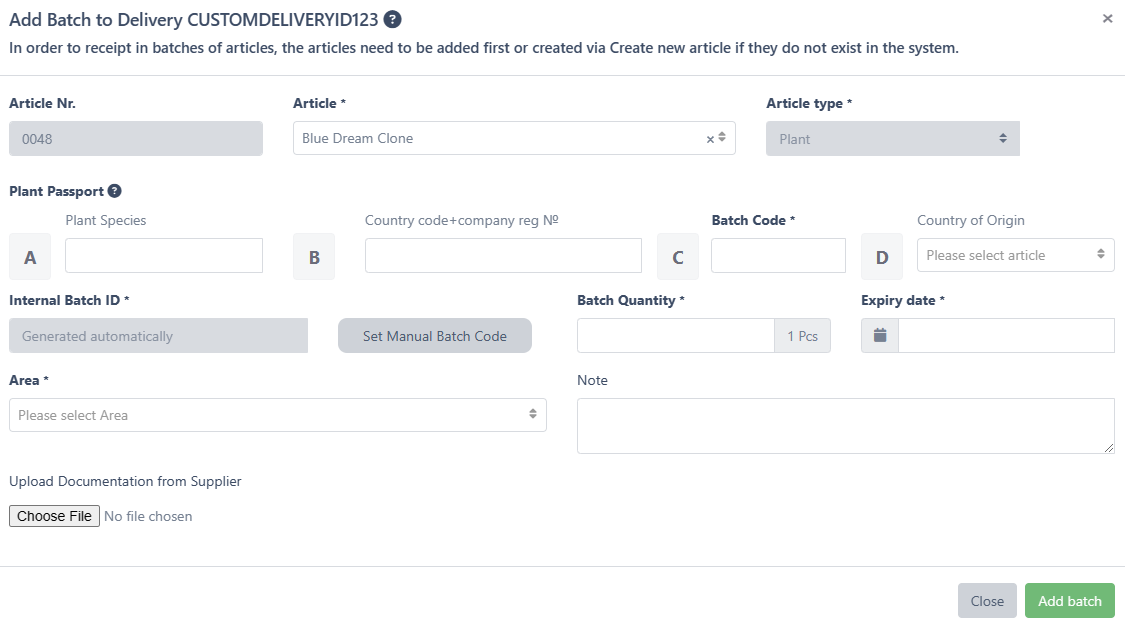
Plant Passport
Input Plant Species field (optional)
Input Country Code + Company Reg No. field (optional)
Input Batch Code field (mandatory)
Input Country of Origin field (optional)
Select your Article from the dropdown field
Input the Supplier Batch ID
This is the batch code provided by the supplier that you can use to reference in case of any defects/faults. If the article batch is registered in the system, the packages will receive a new label with a QR code and new Batch number. By storing the Supplier’s batch code, you ensure that you have all the information available in the event of problems.
Input Batch Quantity
This is the amount of batches of the specified quantity you are ordering. For example, if the Article amount is 5kg, and you order a total of 15kg, you must set the Batch amount to 3, not to 15.)
Input Expiry Date
Sets an expiration date of the article batch
Input Area you want to initially store the Article
Click Set Manual Batch Code button if you would like to set your own Internal Batch Code ID
If you would like an automatically generated Internal Batch ID, do not click Set Manual Batch Code button
By default, an automatic Article batch code is generated, but you have the possibility to set a manual batch code if you use another system for batch coding.
Please input a Note if required
Please click Choose File if you need to Upload Documentation from Supplier
Attach documents and media such as delivery bills or images of incoming goods can also be stored on the system.
Click Add batch button
When Add batch button is clicked, it leads back to Inbound Delivery Detail View and adds in a new row to the table with the newly added batch
Article No. column
Article Name column
Article Unit column
Batch Quantity column
Batch ID column
Expiry Date column
Action column
Trash can icon (removes the batch)
Print label button (adds the label to the Print Center)
Note: Click Add batch button again if you have more Articles and their associated batches to add.
Receipt in Inbound Delivery
Navigate to Goods In via Inventory → Goods In and select your required Delivery Note ID by clicking on the green hyperlink of the Delivery Note ID to access the Inbound Delivery Detail View, if you are receipting in an already created Inbound Delivery.
Click Receipt in batches button
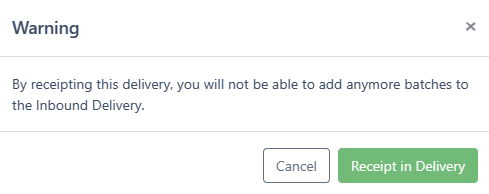
Warning modal appears with the following message:
‘By receipting this delivery, you will not be able to add anymore batches to the Inbound Delivery.’
Click Receipt in Delivery button within the Warning modal, to be able to finalise the delivery and receipt the Received Batches
or select Cancel button if you are not ready to receipt them in
Note: By receipting in your delivery you will no longer be able to add anymore batches.
If the article has a release process, the status is changed to Testing and is now visible within Quality Control (Quality > Quality Control). The article batch can no longer be processed within Goods In.
If the article does not have a release process, the article batch status is changed directly to Released.
Print QR Code Labels for Article Batches from Inbound Deliveries
If you require to print QR Code Labels for Article Batches from Inbound Deliveries, you must navigate to Inventory → Goods In.
Select your required Delivery Note ID by clicking on the green hyperlink of the Delivery Note ID to access the Inbound Delivery Detail View.
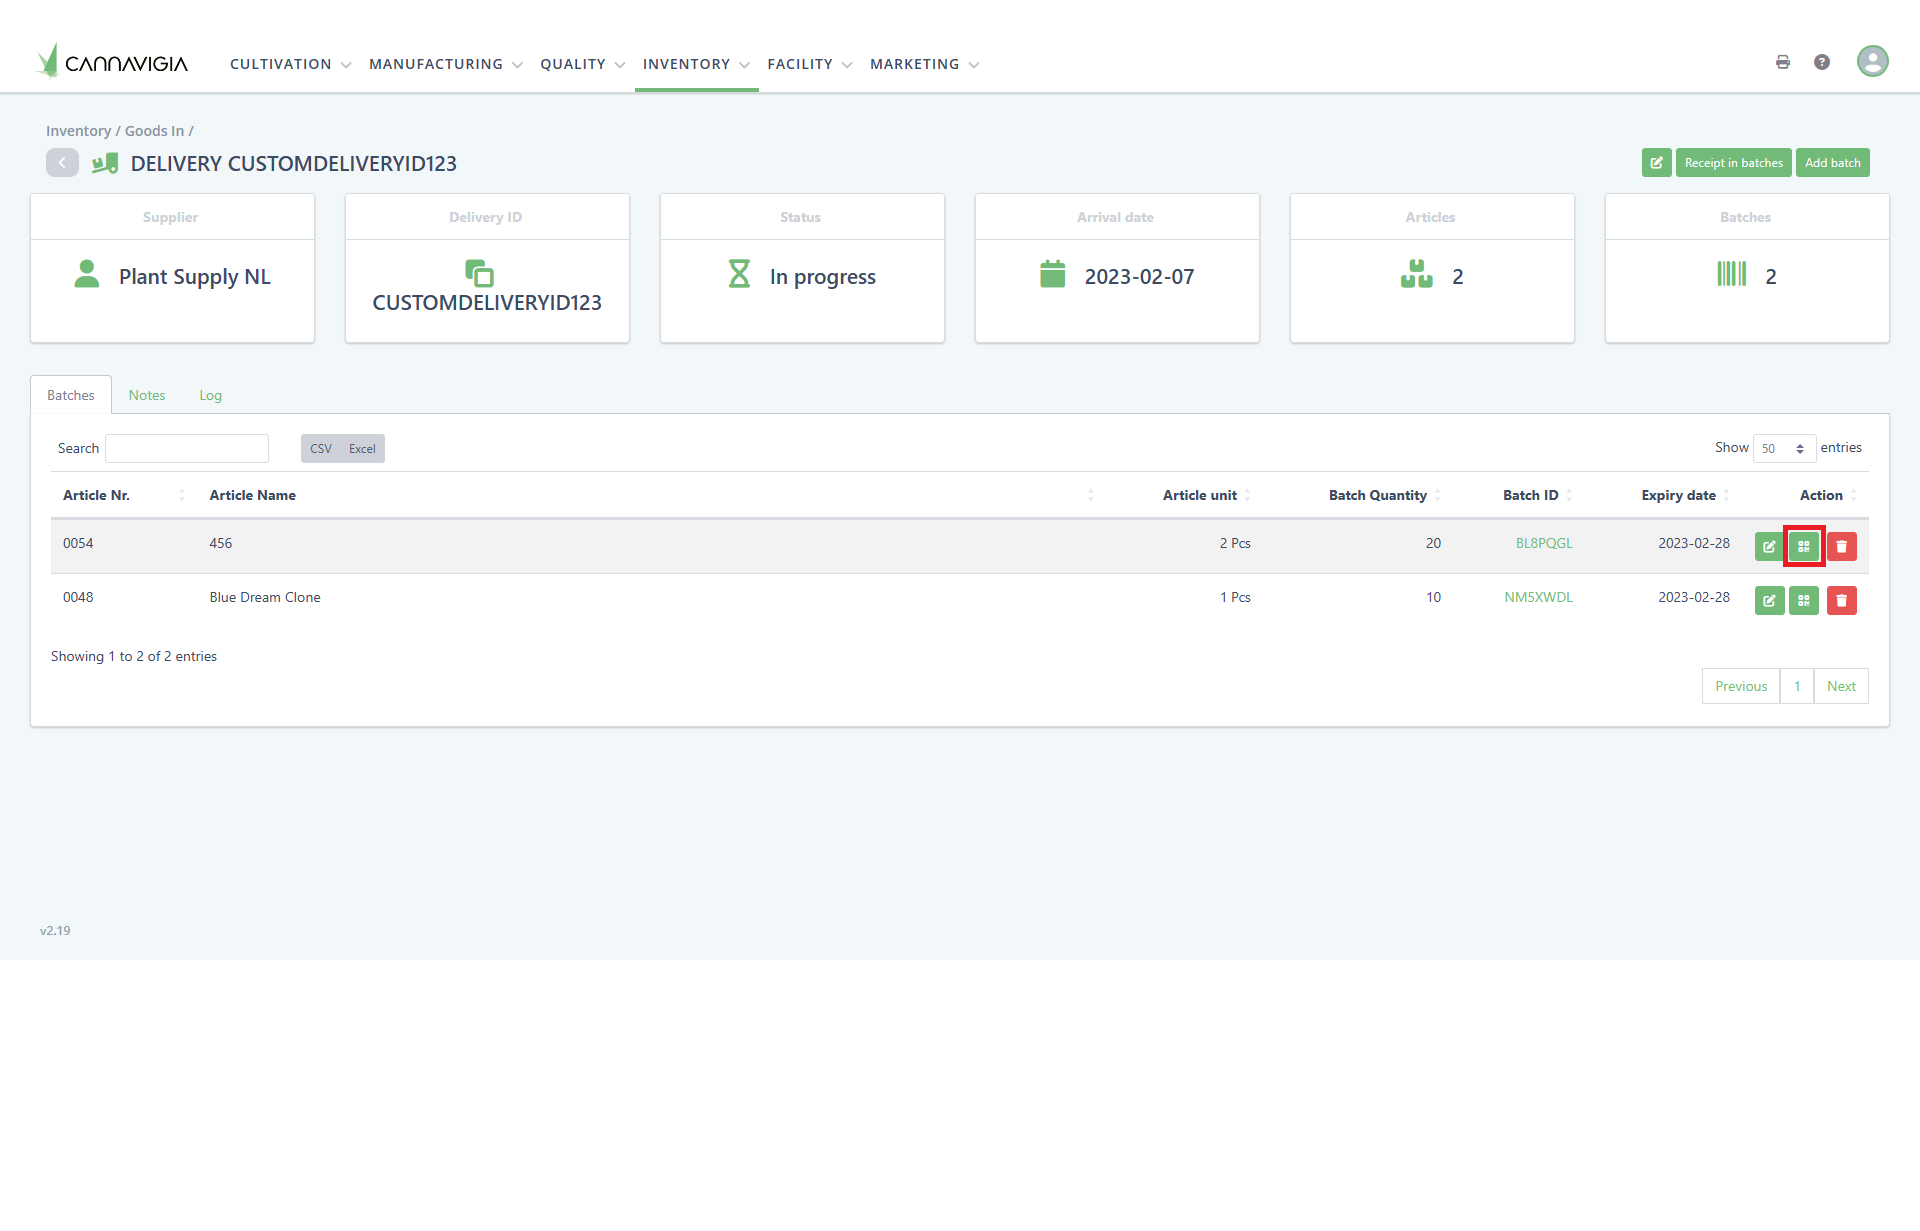
When in the Inbound Delivery Detail View click Add QR code to print center button to add your QR code to for your required Article Batches to print from the Print Center.
Edit an Inbound Delivery
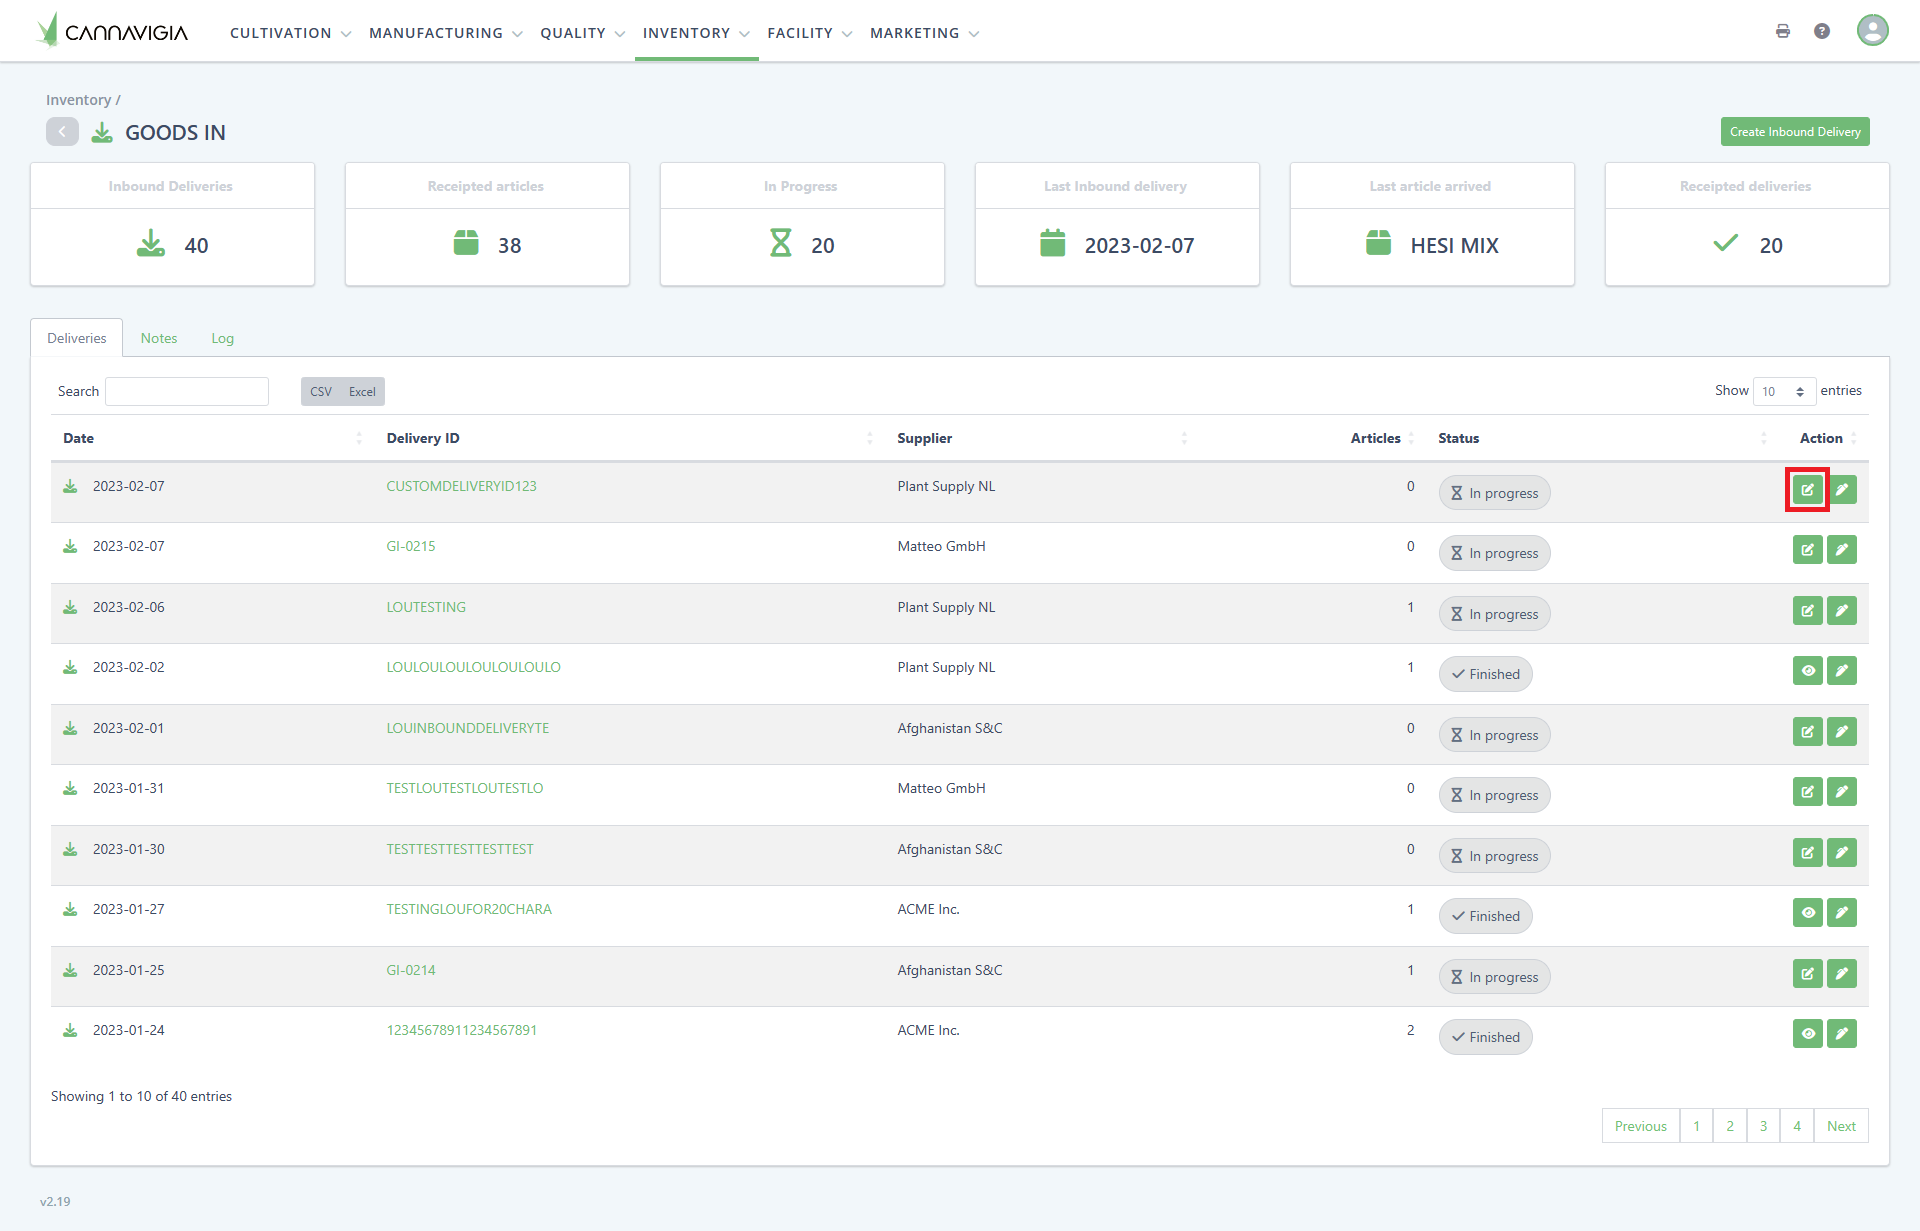
If you require to edit an Incoming Delivery, such as the Inbound Delivery Date or add / update a note you must navigate to the Edit button via Inventory → Goods In.
Select which Inbound Delivery you would like to edit by clicking the Edit button under the Action column within the Goods In List View, on the row of your required Delivery ID.
Edit the Supplier information you are required to and then click Save to save your changes / updates.
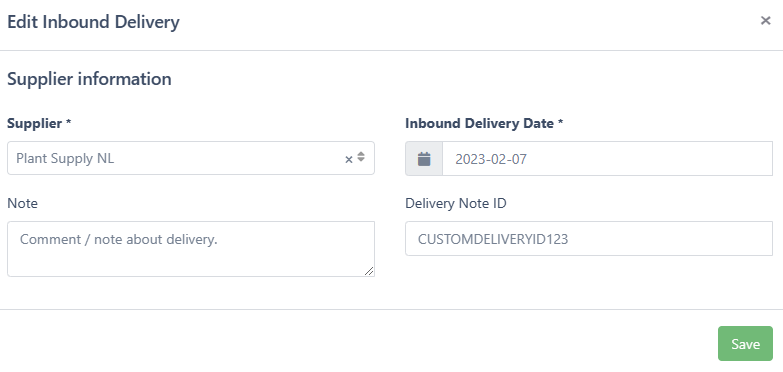
Note: If the status of the delivery is set to Finished you will no longer be able to edit the Inbound Delivery.
Edit an Article Batch
If you require to edit an Article Batch within an Inbound Delivery, you must navigate to Inventory → Goods In.
Select your required Delivery Note ID by clicking on the green hyperlink of the Delivery Note ID to access the Inbound Delivery Detail View.
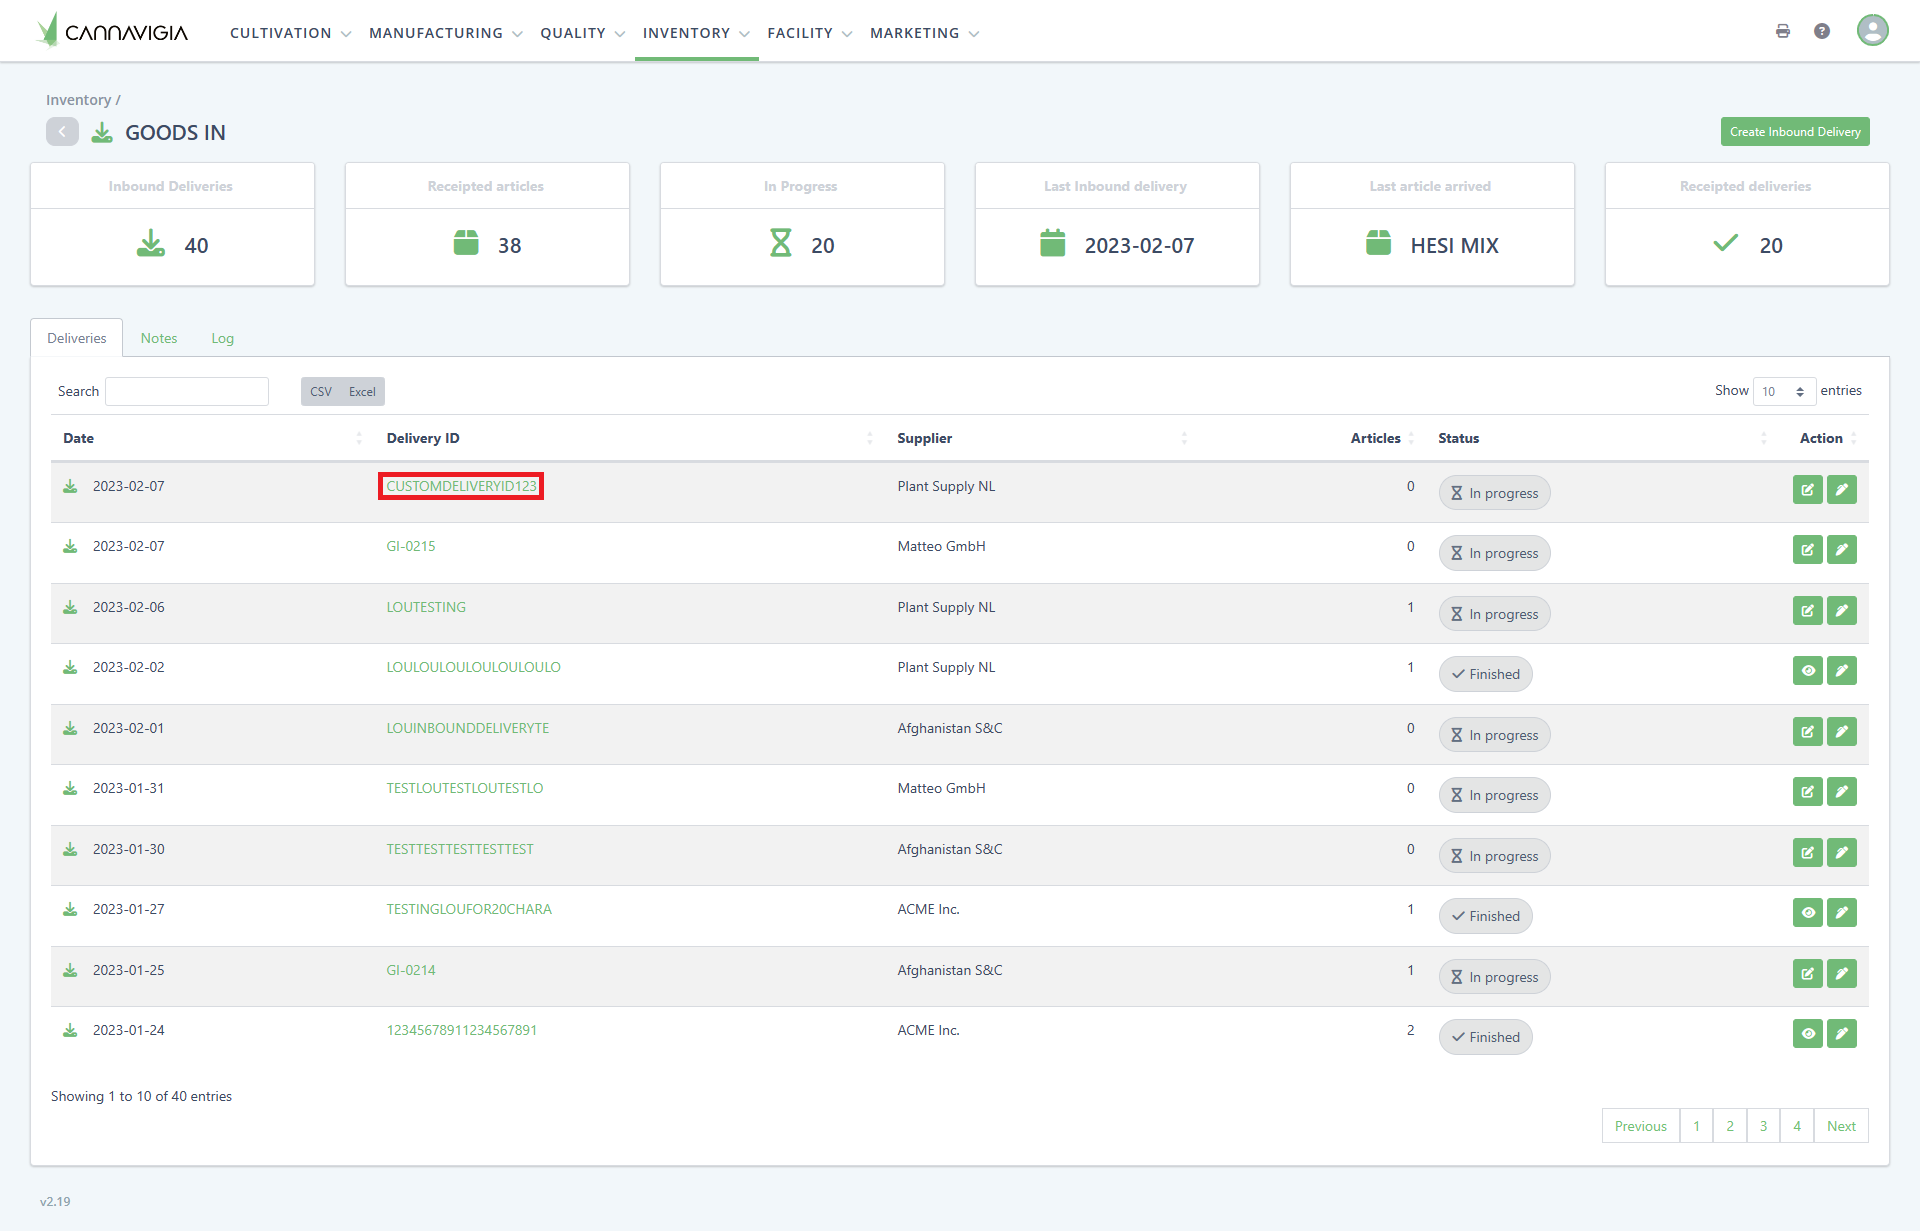
When in the Inbound Delivery Detail View click Edit Batch button to edit the required Article Batch.
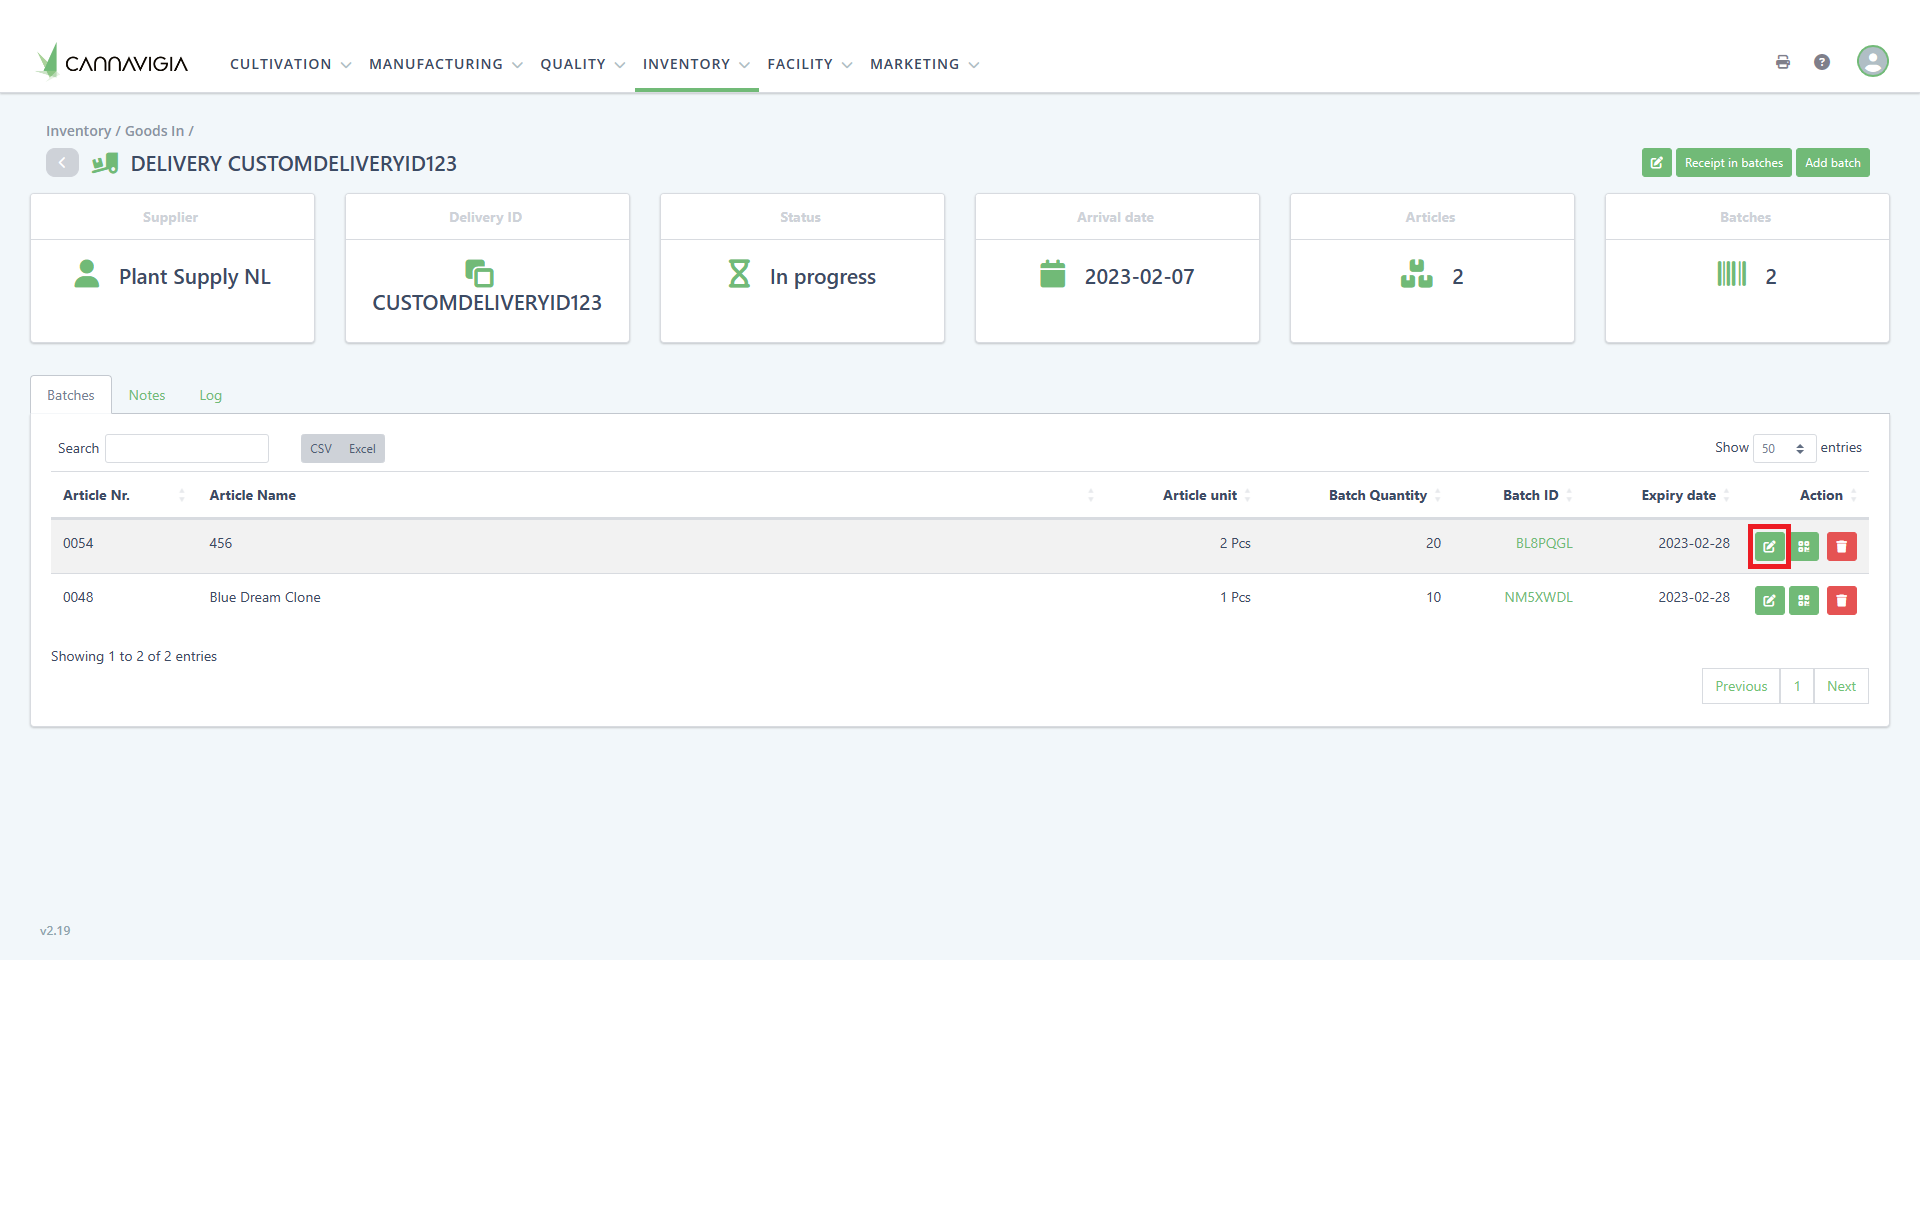
The Edit Batch modal appears where it will let you only edit the fields which are not greyed out.
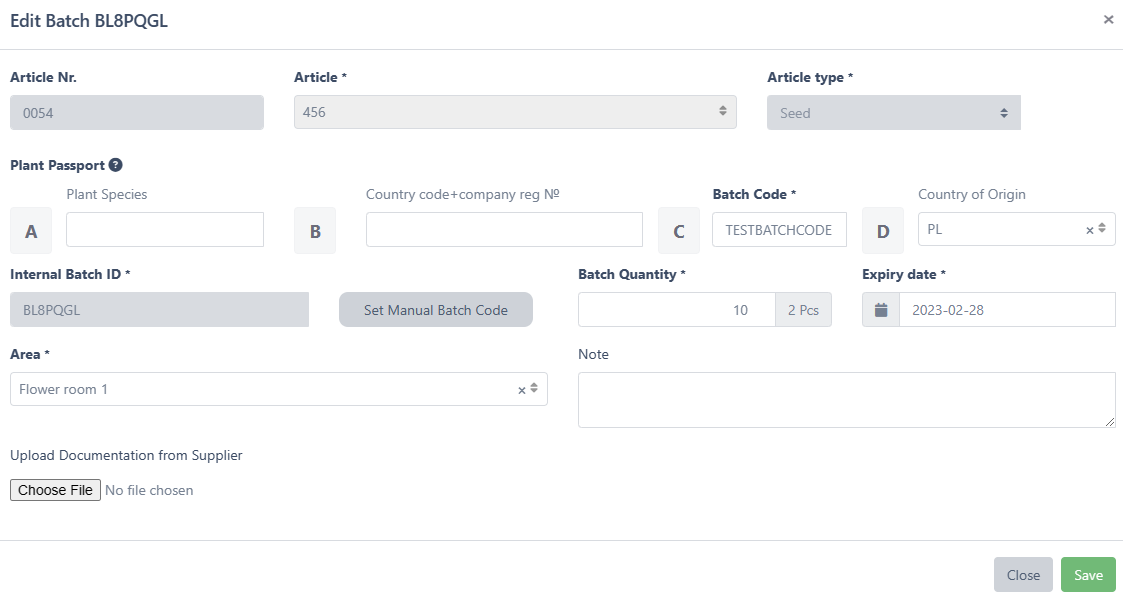
Once you have edited the required detail, please click Save to save your changes.
Note: If the status of the delivery is set to Finished you will no longer be able to edit your Article Batches.